By now, redirection is something WordPress webmasters know fairly well. The standard use case is usually when there is a need to redirect posts and pages from one domain to another, like this:
domain1.[TLD ext] > domain2.[TLD ext]
The TLD extension can be .com, .org, .net or whatever to another website with a different domain name.
While skilled developers can write redirection rules into the .htaccess file on a web server, many non-developers use plugins like Redirection, Quick PagePost Redirect Plugin, or Simple 301 Redirects, These plugins allow you to write redirection rules from one website to another. But, what if you are simply changing the TLD extension for the same site?
Yes, you could set up a new instance of the new site with new domain on another web server and redirect all posts from one site to the other, but that’s too time consuming when it should be very simple.
A redirection plugin takes a request for a page or post published to one domain and then redirects the site visitor to the second domain. If you simply change the TLD extension in the database, then you basically shut the door to the former TLD, because web traffic can no longer reach that TLD extension for the primary domain name.
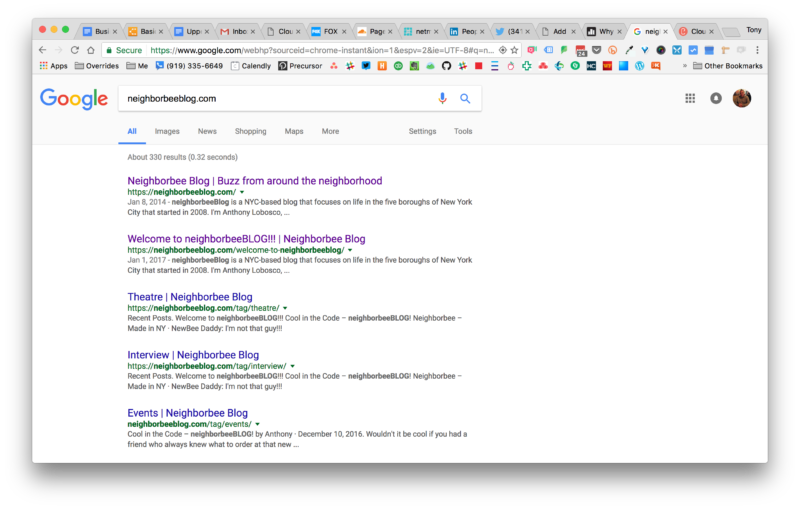
Recently, I’d been working on two sites for a long time client, Neighborbeeblog.com and Nerdhives.com. Neighborbee.com already exists, but the client wanted to launch a blog independent of Neighborbee.com, but with the same name. He registered the domain name, Neighborbeeblog.com. We then launched a new blog on that domain name with the .com TLD extension.
After a few weeks, I thought, why are we using Neighborbeeblog.com when we could simply change that to the new TLD .blog? Using .blog appended to Neighborbee would support brand identity and shorten the domain name by three characters and to three syllables from four. If someone performed a search for Neighborbee, then would then see results in Google (or other search engines) for Neighborbee.com and Neighborbee.blog. The person performing the search result would (I hope) make the connection that both sites are owned by the same company. And, of course, I didn’t want someone taking the neighborbee.blog domain and parking on it or trying to siphon and profit off of Neighborbee.com traffic.
Changing the domain TLD extension at the host was easy. I simply accessed the database and changed the home and site URLs from https://neighborbeeblog.com to https://neighborbee.blog. I needed to figure out how to redirect traffic not only to the home page, but also all post pages.
Fortunately, we use Cloudflare for DNS for all of our client websites. Cloudflare provides an admin panel to set Page Rules. At first, I set “neighborbeeblog.com” to redirect to “neighborbee.blog.” That setting would simply push traffic from people trying to reach the home page of the old domain to the home page of the new domain. But Google had already crawled the site and were returning “Neighborbeeblog.com” pretty permalink URLs for all posts. If you clicked on a Google search result for a post, it would redirect to the new .blog home page, but not the post itself, but we wanted a 1 to 1 redirect and not an all posts to home page redirect.
I contacted Cloudflare support and they were happy to provide suggestions on how I could set a page rule that would redirect all posts from Neighborbeeblog.com to Neighborbee.blog.
It’s pretty simple to do.
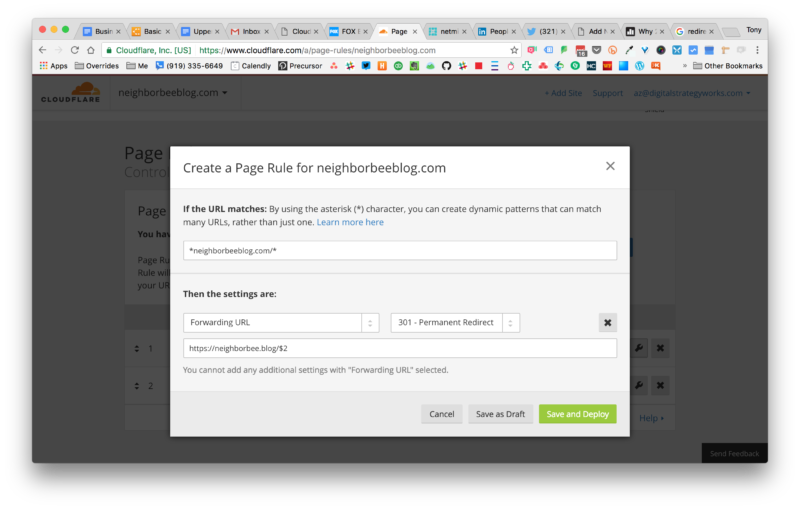
You use a wildcard at the beginning and end of the domain you want to redirect, like this:
*neighborbeeblog.com/*
Then select “Forwarding URL” (as shown above). And, you can select 301 – Permanent Redirect or another option, if it’s not going to be permanent.
Enter your new URL with “/$2” appended to the end, after the new TLD extension. It basically says anything after the trailing slash after the domain TLD should be matched with the wildcard in the first text text field. In other words, the wildcard asterisk (*) redirects this domain and everything after the trailing slash to the new domain. And, the second rule says, accept all redirects and match whatever comes after the trailing slash.
Lastly, if you’ve already submitted your site to Google Search Console, you’re going to want to redirect Google’s crawler to the new site. To do this, you’ll want to access your Google Search Console. Add the new property AND verify. You must verify the property for this to work properly.
Find the Change of Address setting under the gear icon at the top right of the page underneath your account avatar.


Once selected, you will be directed to a page where you can select the new URL. Simply submit your selection and Google will take it from there.
You’ll also want to change your domain name in Google Analytics. Fortunately, GA uses and ID for it’s tracking methodology, so you won’t lose tracking because it’s not domain specific. However, you should change your property URL for best practices. Click this link for a great post on how to change your domain URL in Google.
Hope this helps to solve one of a myriad of issues that pops up from time to time!
If you need assistance performing this task, please don’t hesitate to contact me directly and I can help do this for you.
You must be logged in to post a comment.