Note: I recovered this post from an earlier version of this blog, which was lost when I changed hosting providers. Since this post, Omnigraffle has been updated considerably. You can find the latest version here.
Interaction design has come a long way from simply sketching out ideas on pencil and paper, to powerful tools that enable Information Architects and User Experience Designers to diagram and prototype complex Web sites, mobile applications and social media widgets.
There are a growing number of resources to choose from. Some remain desktop-based, while others are “in the cloud” software-as-a-service applications. Each have their benefits and drawbacks. The most widely used desktop software, Microsoft Visio, is unfortunately PC only. What’s a Mac enthusiast to do? Fortunately, there are options.

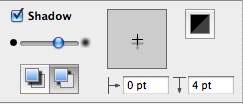
For the example pictured above—the Celebrations.com Site Map—I used the excellent OmniGraffle Professional 5 from OmniGroup. With each new release, OmniGraffle becomes more powerful and flexible. Need to show gradients? It’s a snap with the Style-Shadow feature. Need to add additional magnets to an object? You can do that too in Properties: Connections.

One of my favorite new features is the bezier lines tool, which you have probably used in graphics programs like Adobe Illustrator. With OmniGraffle Professional 5, you can now create custom shapes—a trick not possible in earlier versions.

When I first started using OmniGraffle, I wasn’t clear on how to use its Layers feature to my advantage. As I’ve grown accustomed to the software, creating Layers has certainly helped me build lengthy documents quickly and efficiently. Like any good graphic design software, OmniGraffle Professional 5 Layers feature gives you the ability to create your Web site model in step-by-step fashion, by enabling the turning on or off of objects not intended for every page.
I generally add sitewide features to my first canvas by creating separate layers for sitewide objects. For example, the header, footer, navigation or any static sidebar elements.
You may also lock a layer, hide a layer, or hide from print a layer. The hide from print feature allows you to see the layer in your document, but prevent it from printing on paper or to PDF.

Using the CNTRL key (Mac users) and selecting New Layer from the drop-down menu, I’ll add a new layer we’ll call Content.

I can now insert text into the Content layer.

Copying a canvas is easy. Click once to select the Home canvas. Using the CNTRL-Click method once again, I’ll create a copy of the canvas by selecting “Duplicate Canvas” from the drop-down menu, and name it Landing Page 1.

I now have a duplicate of the previous canvas named Landing Page 1. You can see that the eye under the Conent layer is set to off. I’ve added a new layer, Hero Box, to the currently selected canvas. Voila! I’ve created a new page for my site model without having to manually duplicate my work over and over again from canvas to canvas or layer to layer.

As you can see, Layers are extremely useful when creating your OmniGraffle Professional 5 documents. Did you notice the orange layer, Page Title? It’s a shared layer, which means that it can be created once and be copied to every page, while carrying with it the same exact content contained in the original layer.
Observe also how I am using the shared layer feature to add a Document Title, Canvas Name and Document Creation Date across the entire document. Each time you create a new canvas, simply drag your shared layer down (or up) to the canvas you want to copy it to, then simply drop it in, the same way you might drag and drop a file on your desktop into a new folder.
Instead of moving it entirely, Omnigraffle Professional 5 will make an exact duplicate of the shared layer, placing it into the canvas you chose. Pretty neat trick and very useful for elements you’ll need to make consistent throughout your document. I use it frequently for numbering pages (Page 1 of 27, etc…).
As I mentioned at the beginning of this post, OmniGraffle Professional 5 is not the only choice out there. I just happen to be getting pretty good at it and love it for a number of reasons, which I’ll get into in later posts.
If you’re looking for other solutions, here’s a list desktop and SaaS programs I’ve found for creating anything from site maps to wire frames and working, clickable prototypes:
Desktop Software:
SaaS
You must be logged in to post a comment.